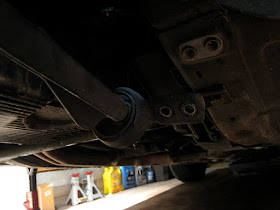
I got the car home and have been doing a major overhaul and the front suspension replacing anything and everything down there. I'll do a 3 or 4 part installment of everything I went over. First up is the front control arms.
 |
| 95 M3 Control Arm |
I then discovered that you can press out the existing bushings and use Lemfoerder ball joints from the e30 control arms. The topic is covered in this thread here. So for about $25-$30 a ball joint you can replace all 4 for about $120 instead of $400. Also I decided to change my tie rods and sway bar links since they were shot as well.
Removing the control arms is no easy task. First to get more room I removed the sway bar.
Then remove the nuts on the top of the subframe and the other one on the spindle. Keep the lolipop with the control arm bushing attached to the car for now unlike the picture below.
After that I used an arsenal of tools to remove the control arms.
The control arm ball joints have a tappered fit which creates a mechanical weld. You need a pickle fork to break this weld. My ball joints were so stuck I used a torch to heat them up, an impact air hammer with pickle fork adjustment and a 4lb hammer just to get the force I needed to break them up. In the end that wouldn't even work and I ended up using this guy.
All these tools were purchased from harbor freight and, honestly, did the job. When the welds break it will go off like a gunshot. There is no other real DIY for this, it's just removing bolts and brute force. The ball joints themselves had some play in them but they were snug in their homes. I tore the boots upon removing them but the control arm ball joints and tie rods themselves did not look responsible for the knock noise I was experiencing on the track.
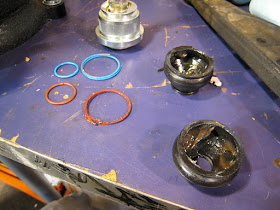
Once the arms were both out I took them to my buddy Justin Pawlak's shop Hotline in Gardena. Justin and I grew up in the same town and when he's not busy winning Formula D races I ask him if I can borrow his tools. ;) I didn't bring my camera so I don't really have any pictures of the process. If you look at that thread above you can see you'll need a 20 ton press at the least. That is what I used. Here are the old ball joints pressed out.
Justin, rushing at the time building badass drift cars, pressed in the first set showing me how to work a press and accidentally tore one of the boots. I pressed in the other arm and replaced the torn boot. I couldn't order just the boot so I bought a $11 Meyle ball joint and salvaged the boot from that.
I also decided to use Delrin front control arm bushings. The set I used is the TC Kline/Turner Brand. Since they are offset of the 1995 M3 only they need a set screw so that they won't move. A simple tap and they were set.
So that's about it for the control arms. Up next is subframe reinforcement followed by steering rack swap with new tie rods.


This is a very thorough and helpful guide on the E36 M3 front suspension overhaul! The detailed explanation of replacing the control arm ball joints and bushings, along with tips on upper arm bushing replacements, is incredibly useful. It's great to see the practical advice for those working on their own suspension. Thanks for sharing your insights!
ReplyDeleteGreat breakdown of the E36 M3 front suspension overhaul process! Your detailed explanations and photos make it much easier for enthusiasts like me to follow along, especially when tackling suspension upgrades or repairs. The information on replacing the lower arm bushing is particularly helpful. I appreciate the step-by-step guide—looking forward to more content like this!
ReplyDeleteJustin helped me back in like 2002 or so when I had an FC. He was barely getting into drifting, I picked up my parts from him at his apartment around the Long Beach area if I remember correctly.
ReplyDeleteGood info on the Ball Joints. Looks like I need a press.