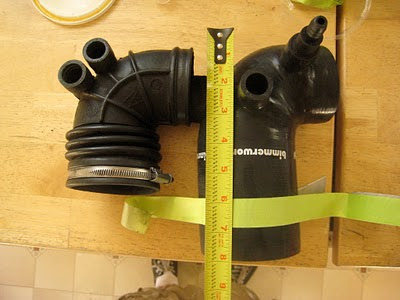
I had to put the anticipation of the added power behind me and cut the silcone boot the proper way. I was already rushing things and started to just eyeball it with an x-acto knife. I knew being tired, rushing things, eyeballing, never really works out so I took a break, went inside cleaned up and figured out how I was going to cut the boot.
So here is the heat-shield, cone and connector setup with the stock accordion intake tube as a mockup. The No-Toil oil on the ITG filter doesn't come off easily so I wrapped it in a plastic bag. I measured, from the end of the stock intake tube, how much additional tube would be needed to put everything in the best position. I felt like I needed about 3/4" more than the stock tube length.
With both of the boots lined up as best as possible, I wrapped tape around the bw boot so I could see what I was doing and made a mark 3/4" further from the end of the stock boot. From that mark it was an additional 1.25" to the end of the Silicone boot. I needed to cut this excess off.
I then made tick marks around the boot measuring 1.25" every inch or so. This would insure that the cut would be straight given the end of the boot was cut square.
I then lined up all the tick marks with a hose clamp to use as a guide to place the x-acto knife against.
Next up make the cut with an x-acto knife following the edge of the hose clamp. I ended up finding the other end of that knife to cut the boot. Works much better than just the blade. ;) Obviously new and sharp is going to work better.
And here's the finished product! As long as the end was cut square you should be able to cut it just as well by measuring the correct distance all the way around and using something to guide your cut. The more you cut off the end though, the less of a 3.5" opening you're going to have in the end. I had to stretch mine a lot having cut that much off the boot.
Here's how it looks in the engine bay. I had to move the charcoal canister down as it was pushing the intake boot up. I put a bolt through the top hole on the charcoal canister into the bottom hole on the bracket. I used a 1/2 inch aluminum spacer to straighten things out. The CC is only held on by one bolt now, but it will hold and the boot isn't shooting into the sky like I've seen on some other cars.
update:One thing I noticed after installing the boot is that the end that attaches to the throttle body could be shaved off about 1/4". When pushed all the way on there it almost interferes with the throttle spring.


No comments:
Post a Comment