Friday, February 6, 2015

AKG Motorsport Race Shifter III THE BEST THING IN THE WORLD. Driveshaft R&R.

I took a look at my blog and realize I update it about as frequently as I go to the track. Which is never. But here goes a run of posts that should satiate the 4 viewers I have who read this blog about a particular M3 which has gone way too deep.

News in my life is I moved to norcal for a new job. No longer doing car design but now industrial design for wearable products with a little startup called Intel. One of the reasons I'm even updating this, as my machine renders away, is that I'm going to finally check off the list a longtime goal which is to race at Laguna Seca! By race I mean track day. I didn't think it would happen so quickly upon moving up here but the opportunity came and I am now trolling forums and looking back on my blog to see what exactly I've done to my car. See this is good reference to have for yourself.

So what is this post about? Oh right, the AKG shifter. Also known as THE BEST MOD TO DO TO ANY E36. I love it. You touch it everyday. It's super notchy and short. I got the stage 3 version because stage 2 was just too docile. I NEEDED stage 3. Calvin from bimmerforums ordered it specifically for me.


While I was there (AKG) I decided to order new motor and trans mounts to match with the shifter. I had solid in there and it was too much. I talked with Andy and he said poly 75D for the motor mounts and e21 solid bushings with cups for the trans...Whaa?? I decided I'm buying the mans shifter I'm going to go with what he says. It's been working out fine. I even started a forum post and compared the BW race shifter and what mounts they use. Turned into a flame fest. I just went with the suppliers recommendations.


So there are the pictures of all the new stuff going in the car. Removing the "bitch clip" from OE the shifter is a pain in the ass. Hence the name.


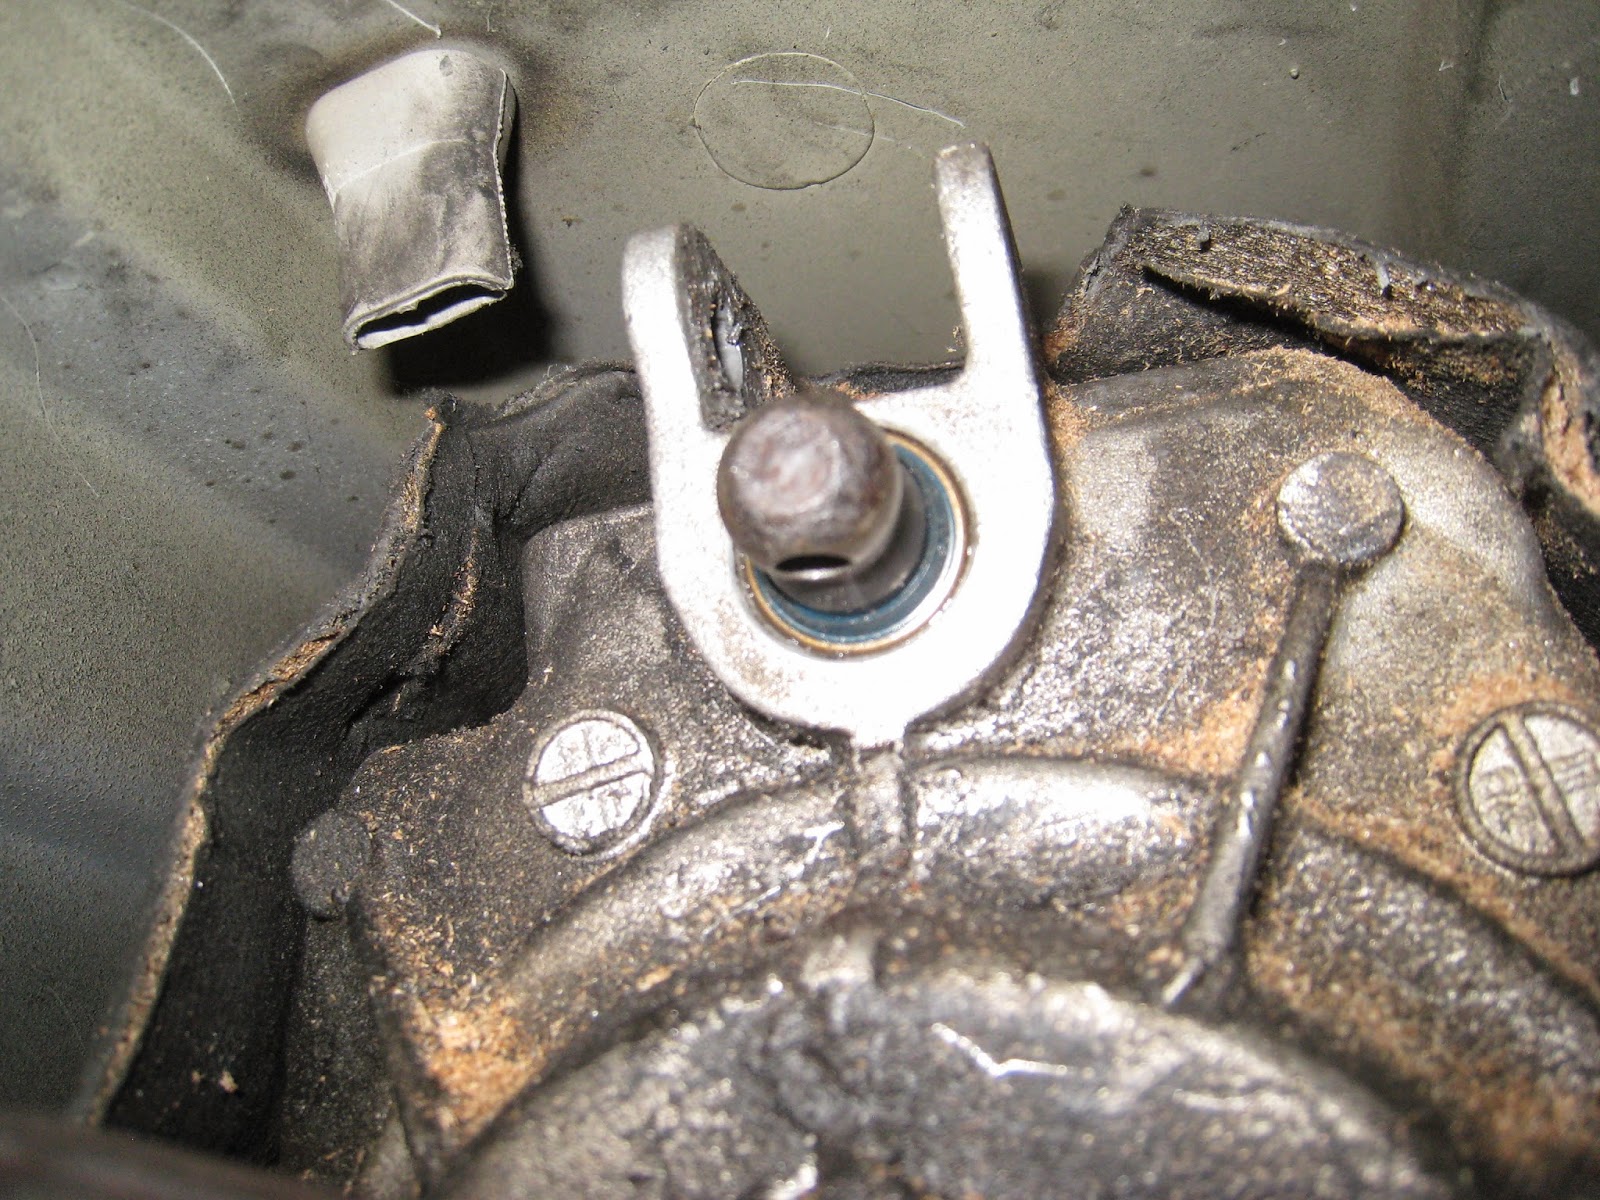
The driveshaft was already out due to all the rear suspension overhaul. The shifter selector shaft was pretty nasty so while I was down there I replaced the seal. Calvin 99Mpower has a good write-up on m3forum about this shifter selector rod seal. I pretty much just followed that DIY. I think I used a hook or seal puller to pull the seal. Honestly it was pretty easy. I say this because my entire car was apart and this was just one out of a hundred things I needed to do. I thought it would be hard and because of that it was easy. If all you were doing was this it would probably be a pain in the ass and take all day. Wait until "you're in there." That tranny fluid ain't really going anywhere...


New Seal and End Joint along side old

New seal in

 So if you buy a new end joint which has the little soft bit in it, you'll learn that the latest design is different from the one you pulled out. There is about a mm flange difference on each side. The tolerances Andy uses are pretty on point so the DSSR wouldn't fit. I sanded down the BMW joint and it fits perfectly now.


The instructions are sparse but they call for cutting down the original "plunger" boot to maintain a seal from the elements. I bought a new one since I mangled my original one getting it out.

Since I was putting in a 3.38LSD from a 99 M3 i had to either change the flange on the diff or change the driveshaft to a 4 bolt. I chose the latter. To R&R the used driveshaft I sourced, I bought a new CSB, guibo and had it balanced at a driveshaft shop. They said the U-joints were serviceable if I cared to go that far but that I should be fine. Within tolerances they said.

 Pictures of the old cracked guibo. Got 150k on the clock? Yours looks like this.


I wasn't able to press the CSB myself so I took it to the guy who balanced it and he took care of me. Driveshaft specialist in San Bernardino.

Using the e21 Solid Trans mounts with cups involved dremeling out the tabs on the transmission as you can see above. The size of the bolt for the e21 is 12mm and stock is 14mm. Or something like that. There are also little tabs on the carrier which need to be ground down for the cups to lay flat.


Let's get this thing put back together already!!

Wednesday, April 23, 2014

Rear Suspension Overhaul Part V: e36 m3 Halfshaft/axle CV Boot Rebuild.

Rebuilding the half shafts on the rear of my e36 M3 proved slightly more difficult than I estimated it to be. I took a look at Calvin's pictures one more time and thought doesn't look that hard. There are a few areas that you should know and might already know about if you read any posts about rebuilding these things. I did not read. I just looked at pictures.

Problem #1: OEM GKN Loebro CV Boot Kit - CLAMPS WRONG SIZE


You probably have these boxes sitting around waiting one day to rebuild your axles. Guess what the clamps will not fit and are not the right size. Maybe some do, maybe some don't but multiple people online have had the same problem. OE BMW might be the right size but OEM GKN Loebro is the wrong size. Don't try for 3 hours super confused trying to force them on over the boots or take them to a shop where the guy just looks at you and says, "these are the wrong size, use an adjustable clamp, we don't even carry this style anymore." They are just the wrong size. You need (2) "large" adjustable clamps and (2) "small" adjustable clamps. Just trust me. Go ahead and get all the way there, find out the clamps are too small, stop right there, go get the adjustable ones. They don't even sell the clamping kind anymore. I looked for them.


Problem #2: Tools

You'll need at least two tools to do this correctly. One crimper to clamp down the OEM style clamp that actually fit and one tool to turn the adjustable clamps. The adjustable clamp is supposed to be superior and holds tighter. Don't spend 2 hours with make shift tools. Just buy something off Amazon.

OTC is a fine brand. This one worked for me.


It's pretty simple to use. I watched this video for instance.

I bought the old style CV crimper off ebay. It was something like this.


Problem #3: Paying attention to how parts go back together. Take pictures.

Just in case you have all your balls, cage and inner race laying on a table and can't remember how it's supposed to go back together here is a correct picture.


And an INCORRECT PICTURE. DON'T PUT IT BACK TOGETHER LIKE THIS. For whatever reason the inner race fit in the cage with the balls but did not move at all. I thought something was wrong, went back to some pictures I took and realized I was super wrong. If I would have left it like this and bolt it back up, bad things would happen.


If I would've had all that information then I would've been good to go and could rebuild these things like a pro in a matter of a few hours.

Obviously use the bentley for the specifics but basically once the axles are removed from the diff you can removed the dust shield with a screw driver and a hammer.


The outer CV joint does not come apart. You can remove the inner CV joint housing from the axle with a big hammer and a solid surface or a press.


I cleaned all the parts with kerosene. You could use gasoline or any super flammable liquid. Just a matter of price really. And disposal.


Since the outer portion cannot be disassembled, let it soak in your thinner of choice until most of the grease has dissolved. Then pack it with new grease. That's the best you can do.


This is the correct orientation of the inner race and outer housing as shown above. The axle is being held in a vise as I use the CV clamp tool to twist up the adjustable clamps. Obviously pack this bitch with grease before throwing on the dust cap. Use loctite on the splines when you press it back together. Put the snap ring back into place. 96-99 models have a small ring that holds this all together. 95 m3 axles are slightly splined to hold the housing up.


Here are the two axles finally built up after halting and having to go get proper tools etc. Yippie next time won't be such a PITA.


Wednesday, April 16, 2014

Rear Suspension Overhaul Part IV: Suspension Powder Coated and Bushings Pressed.

With everything welded up the next step was to drop off the rear suspension at the powdercoater. I used a connection through work, and I didn't really care for the experience so I'm not going to plug them. I don't have a ton of pictures of me sandblasting the suspension pieces mainly because I was in a hurry and we're not supposed to use our camera at work. Here you can see Steve working on the blasted subframe. It took about 2-4 hours to blast everything clean.


Alright so I have to post this because I don't think there has ever been a poop brown subframe. Yeah that's the color this thing came out. Instead of just going BLACK like everyone who reccomended this place said to do and only do, I thought I would get fancy and do DARK GRAY. I'm not going to say it was their fault but this is not "DARK GRAY." The little tiny swatch did look a little warm...


Needless to say I was pretty disappointed with this color. After getting over the fact I just spent 4 hours sandblasting this thing and the money to powder coat it poop brown, I put it back in the sandblaster, brought it back told them to do "SEMI-GLOSS BLACK."


Whew! Almost thought I was going to have to rock an entire brown rear suspension! But there are some things no matter how much time or money you spend on them, if they're not right, they're not right and you do it over. So if you've come to this page with search terms like "Brown subframe, what to do next?!," do it over. Or don't do it over and be UNIQUE. (and never sell your car again)

Let's get pressing. First up Bimmerworld solid aluminum subframe mounts. TMS solid aluminum differential mounts with delrin front mount. I don't have a TON of pictures of everything but there are quite a few examples online. Calvin "99Mpower," has a lot of good documentation. Here's a thread.


It seems solid on the subframe and diff is not as harsh as solid on the motor and trans. I have switched out the motor and trans mounts for something more soft since it was ridiculous. I'll get to that post later.


The subframe bushings are different sizes. Obviously if the bushing just slides in it is too small and goes in the other hole.


Subframe all pressed, reinforced, ready to go. Check.

Now for the diff. I picked up a 3.38 LSD from a 99 M3 with 92k on it. To press the bushing you remove the rear cover. When replacing the cover I used a paper gasket. I called around a couple different shops and they said they use RTV when the gasket isn't available. But the paper gasket WILL work fine. NOT both together. One or the other.


I used 1.8L of Royal Purple Max-Gear 75W-140. I haven't really been too impressed with the RP Syncrhomax that is in my tranny so I'm swapping that out for Redline D4 ATF. I will probably swap this stuff out too, but it's what I had right now. It SHOULD be fine. It meets the requirements for the diff fluid.


Next up control arms and trailing arms.


I went with Lemfoerder OE stock ball joints for the rear trailing arms. 33326775551 The 95 M3 has a solid mounted bushings in the lower trailing arm mount so using all ball joints is an upgrade.


I went with stock OE Lemfoerder bushings for the upper control arm. 33321092247  The lower control arm will be replaced with TMS camber arms so no bushings there. If I were made of money I would've matched the inner lower TMS spherical joint with their solid upper mounts. But I had no more budget for such mounts.


For the RTAB bushing I went with the e46 M3 Meyle HD Split version with limiters. I deliberately chose this mount. I decided to take the advice of most people and stay away from poly in this area since it's a dual articulating mount. The verdict was you could either run spherical or stock with limiters. The beefiest stock option was the e46 M3 Meyle HD version. I can't remember where the shims were from but they're all the same, Vorshlag, Ground Control, Rogue etc.

The part number is 33326770817. They're also found in the Z4 M Coupe. There are two part numbers. One is more split than the other but they're, for the most part, the same thing.


And OEM FAG Wheel bearings with new snap rings and collar nuts. 33411090505 33411133785 07119934755


I used a ton of anti-seize on the bearing to press it in there. The orange seal of the bearing goes OUTWARDS.


The RTAB was a bit tricky with it's split design. I used a c-clamp to help compress it and I pressed it through. The "splits" align vertically when the arm is installed so pointed towards the circular hole.


Final step after all the bushings are pressed in, put the dust plate back on and press the hub into the wheel bearing.


So there you have it. Next up is a special section just on axles (because they were a pain in the ass).